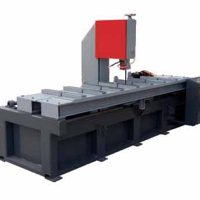
BS-850G CNC Metal Cutting Bandsaw
Cutting Capacity :
In the world of metal fabrication, few tools are as versatile and indispensable as the vertical band saw. While angle grinders and cold saws have their place, the vertical band saw stands out for its ability to handle intricate cuts, diverse materials, and complex shapes with remarkable efficiency. Whether you’re in a professional machine shop, a fabrication house, or a serious hobbyist’s garage, understanding this powerful tool is key to unlocking new levels of precision and capability.
This ultimate guide will explore the different types of vertical band saws, break down the critical specifications, and provide essential tips for safety, operation, and maintenance to ensure you get the most out of your investment.

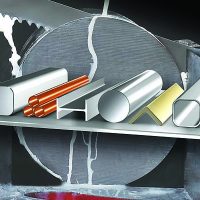
Not all vertical band saws are created equal. Their design dictates their capabilities, from the type of cuts they can make to the level of manual skill required.
1. Manual Vertical Band Saws
Description: The most common and traditional type. The operator manually feeds the workpiece into the stationary blade, controlling the speed and pressure. The saw head is counterbalanced for smooth, controlled descent.
Best For: Job shops, maintenance departments, and prototyping. Ideal for custom one-off cuts, intricate shapes, and notching. They offer the highest level of operator control for complex contours.
Limitations: Cut quality and consistency are highly dependent on operator skill. Not suitable for high-volume production of identical parts.
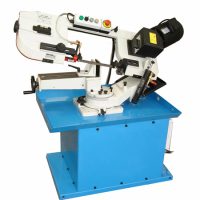
2. Semi-Automatic & CNC Vertical Band Saws
Description: These saws automate the feeding process. A hydraulic or pneumatic cylinder controls the downfeed pressure and rate, ensuring consistent cuts from the first to the last part. CNC (Computer Numerical Control) models take this further, allowing for programmable cutting paths for complex shapes executed with perfect repeatability.
Best For: Production environments requiring high repeatability and consistency. Perfect for cutting large batches of the same profile or for unattended operation after setup.
Limitations: Higher initial investment. Less flexibility for quick, one-off manual cuts compared to a manual model.
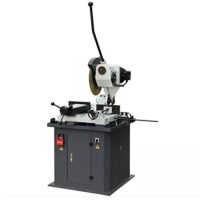
3. Production Cut-Off Saws
Description: A heavy-duty variant designed for one purpose: fast, straight, accurate cut-offs. They often feature a robust, fixed head and a vice that rotates (usually 0-45° or 0-60°) for mitre cuts. Feeding is almost always hydraulic.
Best For: Cutting bar stock, tubing, and structural materials (angle iron, I-beams) to length. They are the workhorses of steel service centers and fabrication shops.
Limitations: Limited or no contour cutting capabilities.
4. Double Column (Gantry-Style) Saws
Description: The most heavy-duty class of vertical band saws. The blade is mounted on a massive, twin-column frame that provides extreme rigidity and minimizes vibration. These are almost exclusively CNC-controlled.
Best For: Cutting very large and heavy plates, often up to several inches thick. Used in heavy equipment manufacturing, shipbuilding, and aerospace industries.
Limitations: Extremely high cost, large footprint, and require significant power (3-phase).
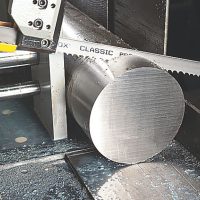
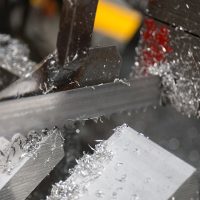
Choosing the correct blade is the single most important factor in achieving good results on a vertical band saw. A poor blade choice will lead to slow cutting, premature blade failure, and poor cut quality.
1. Blade Material:
Carbon Steel: An economical choice for cutting soft materials like wood, plastics, and non-ferrous metals (aluminum, brass). Not suitable for cutting steel.
Bi-Metal (M42): The industry standard for metal cutting. These blades feature a flexible carbon steel back for shock absorption and a teeth edge made from high-speed steel (HSS) welded on. This combination provides excellent heat resistance and durability. Recommendation: For 90% of metal cutting tasks, a bi-metal blade is the correct choice.
Carbide-Tipped: Feature carbide teeth brazed onto a alloy steel body. They offer exceptional wear resistance and are used for cutting abrasive materials like fiberglass, composites, titanium, and high-nickel alloys. They are more brittle and expensive.
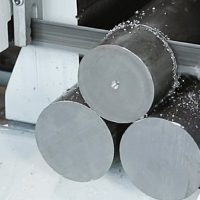
2. Tooth Pitch (Teeth Per Inch – TPI):
This is critical. The goal is to have a minimum of 2-3 teeth in contact with the workpiece at all times. Too few teeth can cause snagging and tooth stripping; too many teeth can cause clogging and overheating.
| Material Type & Size | Recommended TPI | Reasoning |
|---|---|---|
| Thin-Wall Tube & Sheet Metal (< 1/8″ / 3 mm) | 18-24 TPI | High TPI ensures multiple teeth are in contact to prevent teeth from catching and snapping. |
| General Purpose (1/8″ – 1″ / 3-25 mm) | 14-18 TPI | A versatile range that handles most bar stock and structural shapes effectively. |
| Solid Bar Stock (1″ – 4″ / 25-100 mm) | 10-14 TPI | Larger gullets (the space between teeth) allow for efficient chip removal on heavier cuts. |
| Large Sections & Soft Metals (> 4″ / 100 mm) | 6-10 TPI | Very large gullets are needed to manage the high volume of chips produced. |
| Variable-Pitch Blades (e.g., 10/14, 8/12) | All of the above | The varying tooth spacing disrupts harmonic vibration, resulting in smoother cuts, reduced noise, and longer blade life. A great general-purpose option. |
3. Blade Width and Thickness:
Width: Determines the minimum radius you can cut.
1/4" (6 mm): Can cut very tight radii (approx. 3/16″).
1/2" (13 mm): A good balance for both straight cuts and moderate contours.
3/4" (19 mm) or 1" (25 mm): Best for straight cuts and cut-offs only. Very rigid.
Hook vs. Rake Angle: A positive hook angle (e.g., 10°) is aggressive and best for cutting softer metals and non-ferrous materials. A raker tooth (0°) is more general purpose and better for harder steels.
A well-maintained saw is a safe, accurate, and productive saw.
Daily/Pre-Use Checks:
Blade Condition: Inspect for broken, worn, or missing teeth. Check for cracks, especially near the weld.
Blade Tension: Ensure the blade is tensioned according to the manufacturer’s chart. An under-tensioned blade will wander and break; an over-tensioned blade will fatigue prematurely.
Tire & Wheel Condition: Ensure the rubber tires on the wheels are not cracked or glazed. Worn tires cause poor tracking.
Guide Alignment: Check that the blade guides (both side and rear bearings) are properly adjusted. They should almost touch the blade but not so close that they cause friction.
Coolant: Top up the coolant reservoir and ensure the nozzle is aimed correctly at the blade teeth. Use the correct ratio of coolant concentrate to water.
Weekly/Monthly Maintenance:
Clean the Machine: Remove chips and debris from the table, base, and guides.
Lubrication: Grease the pivot points and lead screws according to the manual.
Check Drive Belts: Inspect for wear and proper tension.
Inspect Electrical Components: Look for loose wires or damaged plugs.
Long-Term Care:
Replace Worn Parts: Proactively replace guide bearings, tires, and drive belts before they fail.
Check Alignment: Over time, the table squareness and blade tracking may drift. Consult your manual for alignment procedures.
Respect the machine; it can cause severe injury in an instant.
PPE is Mandatory: Safety glasses, hearing protection, and sturdy gloves are a must. Do not wear loose clothing, gloves, or jewelry that could get caught in the blade.
Know Your Emergency Stop: Locate and test the emergency stop button before starting any work.
Secure the Workpiece: Use a vise or clamps whenever possible. Your hands should never be used to hold small parts near the blade.
Let the Blade Do the Work: Never force the workpiece. Applying excessive pressure can break the blade or cause the workpiece to twist violently.
Maintain a Safe Distance: Keep your hands at least 4 inches away from the blade. Use a push stick for small or awkward pieces.
Never Reach Behind the Blade: Be aware of the blade’s path on the backside of the workpiece.
Stop the Machine Completely: Before making any adjustments, changing speed, or clearing a jam, ensure the machine is fully stopped and disconnected from power.
Choosing the right saw and operating it correctly directly impacts your bottom line through saved time, material, and tooling.
Match the Saw to Your Work: Don’t buy a massive double-column saw for cutting small tubing. Conversely, don’t try to cut 6-inch solid stock on a light-duty manual saw. Be honest about 80% of your work.
Invest in Quality Blades: A cheap $20 blade will cost you more in ruined workpieces, downtime, and frustration than a high-quality $60 bi-metal blade ever will.
Use the Correct Speed: Different metals require different blade speeds (SFPM – Surface Feet Per Minute). Refer to a speed chart. Cutting aluminum too slowly or tool steel too quickly will ruin blades.
Implement Fixturing: For production work, simple jigs and stops allow you to load and cut parts incredibly quickly and consistently.
Keep it Sharp: A dull blade is dangerous and inefficient. Change blades as soon as you notice a significant drop in cutting performance or increased burrs.
By understanding the types, mechanics, and best practices outlined in this guide, you can confidently select, operate, and maintain a vertical band saw that will be a cornerstone of your metalworking capabilities for years to come.
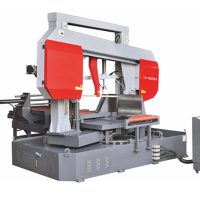
Cutting Capacity :
Cutting Capacity :