BS-215G Horizontal Band Saw
Cutting Capacity :
In the sawing process, the “feed rate” typically refers to the depth or speed at which the saw blade cuts into the workpiece per unit of time. It is a key parameter affecting cutting efficiency, blade life, and cut quality.
Simple Analogy: Think of it like cutting with a knife. The feed rate is “how hard you push down.”
Feed Rate Too Low: The blade “slips” on the workpiece, causing friction heat, rapid blade wear, and low efficiency.
Feed Rate Too High: The blade teeth are overloaded, potentially leading to broken teeth, blade breakage, and a rough cut surface.
Selecting the feed rate is not about a fixed value but a dynamic balancing process, requiring consideration of the following four core factors:
Material Properties (Material):
Type: Hardness, strength, toughness. Example: Soft aluminum (can use higher feed) vs. high-hardness alloy steel (must use lower feed).
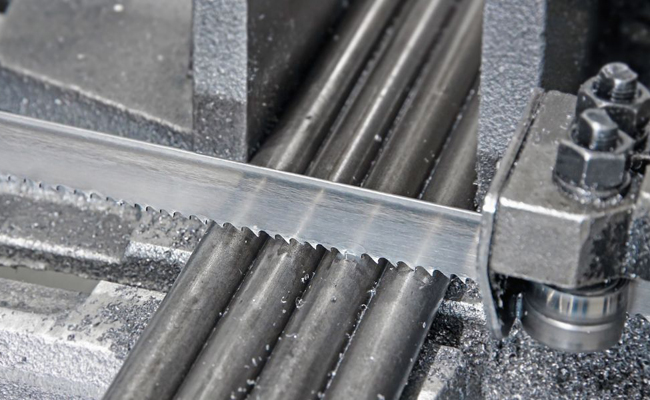
Shape and Size: Solid round bar, square bar, tubing, profiles. Larger cross-sections require greater total cutting force, but the initial feed should be gradual.
Surface Condition: Presence of scale, hardened skin? Reduce feed when encountering hardened layers.
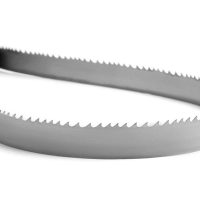
Saw Blade Itself (Blade):
Tooth Geometry: Regular, hook, variable pitch. Hook teeth have larger chip gullets, making them more suitable for higher feed rates in soft materials.
Teeth Per Inch (TPI): This is one of the most critical factors.
Principle: The number of teeth in contact with the workpiece should ideally be 3-6.
Calculation: Workpiece thickness (inches) x TPI ≈ Number of contacting teeth. Example: Cutting a 100mm solid steel bar (~4 inches) with a 4 TPI blade gives ~16 contacting teeth, which is too many and can cause chip clogging. A 1-1.5 TPI blade should be selected.
Blade Material: Bi-metal blades (e.g., M42) can handle higher feed rates and speeds than carbon steel blades.
Sawing Objective (Goal):
Priority on Efficiency (Roughing): Within the machine and blade’s capacity, a higher feed rate can be selected, but it must be based on normal chip formation and sound.
Priority on Surface Finish (Finishing): Choose a lower feed rate for a smoother cut surface.
Priority on Blade Life: Use a moderate to conservative feed rate to avoid excessive wear.
Machine Condition (Machine):
The saw machine’s power, rigidity, and stability. Older or low-power machines cannot use the same high feed rates as powerful CNC saws.
Important Safety Note: Always wear appropriate PPE and ensure the workpiece is securely clamped before operation!
For Manual/Semi-Automatic Saw Machines (with Feed Control Valve):
Step 1: Consult the Reference Chart
A “Material – Speed – Feed Rate” recommendation chart is usually found on the machine itself or in the manual. This is the most direct and safest basis for the initial setting. Find the recommended feed rate range based on the material type and size you are cutting.
Step 2: Initial Setting
Set the feed control valve to the middle-to-lower value of the recommended range (the more conservative side). This is a safe starting point.
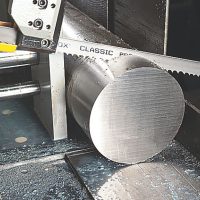
Step 3: Test Cut and Observe (“Listen to the Sound, Check the Chips”)
Start the saw and begin cutting. Observe closely and listen:
Observe the Chips:
Ideal State: Chips are tightly curled, shaped like a figure “8”, and silver or light straw in color. This indicates an optimal feed rate.
Feed Rate Too High: Chips are blue or dark purple (overheated), messy, and thick. Immediately reduce the feed rate!
Feed Rate Too Low: Chips are powdery or fine needle-like, and the cutting sound is sharp/high-pitched. Appropriately increase the feed rate.
Listen to the Sound:
Ideal State: A steady, heavy “humming” sound.
Feed Rate Too High: Sound is labored, struggling, and the machine may vibrate.
Feed Rate Too Low: Sound is sharp, light, with a scraping or rubbing noise.
Step 4: Fine-Tune and Optimize
Based on observations in Step 3, slowly adjust the feed valve until the ideal chip formation and sound are achieved. This is the optimal feed rate for the current working conditions.
For Fully Automatic/CNC Saw Machines:
Parameter Input: On the control panel, you will directly input the feed rate (e.g., in mm/min or inches/min).
Rely on Database: Modern CNC saws have built-in material databases. You simply select the material type (e.g., A3 steel, 304 stainless steel, 6061 aluminum) and workpiece size, and the system will automatically calculate and recommend suitable blade speed and feed rate. This is the most recommended method.
Manual Fine-Tuning: Even when using the database, when cutting a new material grade for the first time, observe the chip formation and make necessary fine-tuning adjustments to the auto-generated feed rate.
| Symptom | Possible Cause | Solution |
|---|---|---|
| Chips are blue, smoking | Feed rate is too high, causing severe overheating. | Immediately reduce the feed rate! Check if the blade speed is too high. |
| Chips are powdery | Feed rate is too low, the blade is rubbing, not cutting. | Appropriately increase the feed rate. Check if the TPI is too high. |
| High-pitched screeching/ squealing from blade | Feed rate too low or blade speed too high; Incorrect TPI. | Increase feed rate or decrease blade speed; Check and replace with correct TPI blade. |
| Rough cut surface, deep scoring marks | Unstable or excessive feed rate; Worn or broken teeth. | Adjust feed to a steady level; Check and replace the blade. |
| Sudden blade breakage | Severely excessive feed rate; Workpiece not clamped securely; Blade guide arms improperly adjusted. | Emergency Stop! Check feed system, clamping mechanism, and blade installation/setup. |
Cutting Capacity :

Cutting Capacity :